Posted in Basics, Main Dish, Uncategorized

Meatloaf

Meatloaf is easy to make, and inexpensive. However, if overcooked, it can be dry and flavorless. It also has a longer cook time, so planning ahead is important.

I use the basic Betty Crocker meatloaf recipe, which I will put here. And then I will tell you about alterations that can be made.

Ingredients

2 eggs, beaten
1/2 cup ketchup
1/2 cup milk
1 cup Progresso™ Italian Style Bread Crumbs
1/4 cup finely chopped onion
1lb. lean ground beef
1/4 cup ketchup – for topping

Directions

  • 1 Heat oven to 350°F. In large bowl, combine all meatloaf ingredients; mix well. Press mixture in ungreased 8×4-inch loaf pan. Bake at 350°F. for 40 minutes.
  • 2 Remove meatloaf from oven. Spread 1/4 cup ketchup evenly over top. Return to oven; bake an additional 15 to 20 minutes or until meat thermometer reaches 160°F. and beef is thoroughly cooked. Let stand 10 minutes before serving.


SO –  I like to mix things up a bit. For example, you can use 1/2 ground beef, and 1/2 Italian sausage. Or you can use a mix of beef and chicken, or beef and pork. The chicken and the pork will make the meatloaf less “fatty” – but you do want SOME fat to keep the meatloaf moist. I also like to chop onions and carrots really fine and saute them until tender in some oil. Then I add this to the meat mix – stretches the meat a little bit and makes the loaf a bit more nutritious.  See Martha’s recipe below for an example of what I usually do.

If you don’t want to splash out for store bought breadcrumbs, you can make your own – or tear a couple of slices of fresh bread into tiny bits and use that.

If using Italian sausage and Italian breadcrumbs, you will have a well seasoned loaf. But if you don’t use those, be sure to add some Italian seasoning to your meat mix.

If you don’t have a loaf pan, you can just shape it into a loaf on a rimmed baking sheet. It make spread a little, but it will still work.

You can also play with the topping. I have been known to add mustard (dried) to the ketchup, or a little brown sugar. Or use storebought BBQ sauce instead for a different spin (just avoid all the Italian seasonings).

Really what I tend to do is just like this recipe from Martha Stewart. I just don’t use veal – I use beef and pork. Cannot go wrong with Martha’s basic recipes.

Here are links to 2 other great meatloaf recipes. I love Pioneer Woman for recipes that work and taste good. Not always great for the diet – but when you need a dressed up meatrloaf, this is great. Pioneer Woman’s favorite meatloaf link.

 

Posted in Basics, Beef, Chicken, Main Dish, Uncategorized

Basics: Gravy

Gravy is really a simple thing to do. You need some fat, a thickener, and then a liquid.

Much of the time the gravy is made after you do something with meat. You pan fry chicken – make gravy for the mashed potatoes. Sear beef – make gravy or wine sauce to go over it.

SO – when you fry or saute your meat, there are usually browned bits all over the pan, and maybe a little bit of oil left from frying. You want those! (I think the fancy smancy 2 dollar word for the browned bits is “fond” – but who knows.)

So – saute your meat or fry your chicken. Then, pour off all but about 2 TBS of the oil left. (If you are just making gravy without the meat frying first, you can always start by melting some butter in a pan.) With the heat on, stir in 2 TBS of flour, and some salt and pepper to taste and give the flour a minute to soak up the oil. A wisk is useful here to get everything incorporated. Don’t let the flour burn! Just give it a minute to saute in the oil so it loses the floury taste.

Then prepare to add your liquid. For chicken, or things like chicken fried steak (which is really beef) you usually use milk or half and half. The amount of milk you add determines how thick your gravy ends up. However, you can also use wine (when you are legal age to buy it!) or broth –  start with a cup of liquid, and stir in with the wisk. This is where you want to wisk it well to avoid lumps. It should thicken pretty quickly, and then you can add more liquid to make the gravy the thickness you want. Be sure to taste again for salt or pepper if needed.

When I sear steaks, I deglaze the pan with wine ( which means after the steaks are removed from the pan I throw in enough wine to get the browned bits off the bottom of the pan) and then stir in some flour – and then add more wine or broth until I have a thickened sauce for the meat.

Sometimes, you need enough gravy for a gravy boat to pass around a table of friends. If this is the case, here is a great recipe from Ina Garten – enjoy her stuff! –

Ingredients
1/4 pound (1 stick) unsalted butter
1 1/2 cups chopped yellow onion (2 onions)
1/4 cup flour
1 teaspoon kosher salt
1/2 teaspoon freshly ground black pepper
Defatted turkey drippings plus chicken stock to make 2 cups, heated
1 tablespoon Cognac or brandy

Directions

In a large (10 to 12-inch) saute pan, cook the butter and onions over medium-low heat for 12 to 15 minutes, until the onions are lightly browned. Don’t rush this step; it makes all the difference when the onions are well-cooked.
Sprinkle the flour into the pan, whisk in, then add the salt and pepper. Cook for 2 to 3 minutes. Add the hot chicken stock mixture and Cognac, and cook uncovered for 4 to 5 minutes until thickened. Add the wine and cream, if desired. Season, to taste, and serve.

Click here to go to the recipe directly, and there is also a video link there which can show you how to do it.

Posted in Chicken, Main Dish, Uncategorized

Cheep, cheap, chicken!!

Chicken is cheap and we have 2 family recipes that taste good, are easy to make and utilize inexpensive chicken.

Chicken Enchilada Casserole is a favorite of my mom’s and her mom’s. The crazy part of the story was that neither one could keep up with their recipe – so my mom would call her mom to get the recipe mailed to her – and 6 months later, Nana would call my mother wanting her to mail a copy of the recipe because she could no longer find hers. This might explain why when I moved my grandmother into her assisted living home, I found quite a few copies of the recipe.

I am not sure where the recipe originated – but it is very like the King Ranch Chicken Casserole recipe popular at the time. Mom and Nana’s version is the quick, dinner in a hurry version, great for leftover chicken from an earlier meal. Today, rotisserie chickens are also fairly easy to obtain, and fairly cheap, and eliminate the necessity to have cooked chicken on hand.

The second recipe is Creamed Chicken, via Aunt Lisa’s cookbook for Dad when he graduated from college. She put together the family recipes she thought Dad would use – and I have enjoyed making many of those recipes over the years. Creamed chicken is also a great way to use up leftover chicken. Not a ton of chicken left? Add some frozen veg and a serve over rice and you have a whole meal. If you can make the basic white sauce needed for mac and cheese, then you can make creamed chicken. Anyway, here are the recipes!

Chicken Enchilada Casserole

  • Lightly grease a 9 x 12 casserole (about 3 quarts). Cut 6 corn tortillas into 1/4s and line the casserole with the tortillas.
  • Filling:  Combine the following

One chopped onion, medium size

One chopped green pepper

4 cups cooked chicken (buy canned chicken, or a rotisserie chicken, or 3 chicken breast poached in simmering water until done)

1 Can golden mushroom soup

1 Can cream of chicken soup

1 Tbs chili powder

1 can diced tomatoes

1 small can green chillies

  • Pour 1/2 this mixture over the tortillas. Top with grated cheese – cheddar, or a Mexican cheese blend.
  • Cut 6 more corn tortillas into 1/4s and arrange on top of the chicken mixture. Pour remaining chicken mixture over the second layer of tortillas.

Bake at 350 for 30 min. During last 5 minutes, sprinkle top with more shredded cheese.

Notes:

  • If you cannot find Golden Mushroom soup, then use 2 cans cream of chicken, or 1 can cream of chicken and 1 of cream of mushroom.
  • You can use a can of rotel tomatos and chilis instead – or even a jar of salsa if that is what you have on hand.


For other version of the King Ranch Chicken casserole, check out these links:

When you have time to savor the cooking and eating… Homesick Texan’s version, and some history of the recipe.

This is the modern version of my Nana’s recipe – as reported on NPR.

Creamed Chicken via Aunt Lisa, from Betty Crocker Picture Cook Book

Melt 6 TBS butter in a saucepan. Add 6 TBS flour , 1 tsp salt and 1/8 tsp pepper and stir for a minute to remove floury taste.

When nice and bubbly, remove from heat and stir in 1.5 cups of well seasoned chicken broth and 1 cup cream or whole milk. (Aunt Lisa’s notes: Lowfat milk will do, but doesn’t taste as rich.For the chicken broth I often just use 2 chicken bouillon cubes in 1.5 cup boiling water, and add some salt, pepper, parsley flakes, etc.)

Put back on heat and bring to a boil and boil 1 minute, stirring constantly. Stir in 1 cup cooked diced chicken or turkey.

Serve over rice, in patty shells, pastry cases, biscuit rings, or over toast or noodles.  Makes about 6 servings.

(My notes: I usually use more chicken than 1 cup. My mother made something similar and would butter pieces of bread and push them into muffin tins to make bread “cups”. She would put the muffin tin into the oven to toast the bread. After the cups were lightly brown they would be allowed to cool. Put a couple on a plate, fill with the chicken mixture. Creamed chicken is very good over old fashioned southern biscuits- but the canned or frozen version work well too.)

Posted in Uncategorized

Pizza! Pizza! A staple of college life….

Making pizza dough isn’t really that difficult. Takes a little planning ahead, but when the result is your own customized pizza, it is a win – win.

When the boys were small, I used a recipe that came from a book called Into the Mouth of Babes by Susan Tate Firkaly. This recipe uses honey, and was considered a more whole food alternative to buying pre-made crust dough. It doesn’t take long to put together, but does have a 10 minute kneading time and a rise time of 1.5 hours.

Note about yeast: You can buy different types of yeast these days. There is rapid rise yeast, traditional yeast, and bread machine yeast. If you buy the regular active dry yeast, the “proofing” step of adding the yeast to warm liquids is essential. The yeast won’t activate without a liquid at 110 – 120 degrees. Too hot, and it will kill the yeast. Too cool, and it won’t rise. Instant “rapid rise” yeast is easier because it doesn’t require the “proofing” – liquid will do the job of activating the yeast without the needed heat. I generally do the proofing though – it tells me that my yeast isn’t dead BEFORE I add it to all the other ingredients. You want your yeast and sugar mix to be foamy/frothy at the end of the 5 minutes to indicate that the yeast is ALIVE.


Family Pizza Dough

Crust:

1 TBS dry yeast

1 ¼ C warm water

1 tsp honey

2 TBS oil

1 ½ tsp salt

3 – 3 ½ C flour


Dissolve yeast in water with honey. When yeast makes bubbles on surface, add oil and salt. Add flour a bit at a time – enough to make a stiff dough. Knead 10 min. and let rise 1 ½ hours. Punch dough down and spread out on 2 pizza pans. Grease and flour pans for best results.

Frugal Gourmet Pizza Dough

In later years, I used the Frugal Gourmet Cooks Italian  ( by Jeff Smith) recipe for pizza dough. This recipe will make 3 14 inch pizzas, and when your kids get bigger – they eat more pizza.

1 1/4 cups tepid water (about 100 degrees)

1 package rapid rise yeast

1/2 tsp salt

1 Tbs Olive oil

About 3 1/4 cups unbleached flour

1/4 cup cornmeal

Place the tepid water in a mixing bowl. Dissolve yeast and salt in the water. Add the oil, 1 1/2 cups of the flour, and the cornmeal. Beat together for 5 – 10 minutes to form a sticky batter (this is with a mixer – can also do by hand and call it a workout). Knead in the remaining flour until you have a smooth dough. Place on a clean counter and cover with the bowl (I put it in a lightly greased bowl and cover the bowl with a clean towel.) Allow to rise until doubled in bulk, about an hour. Punch the dough down and divide into 3 portions.

To make pizza, roll a portion of the dough on a lightly floured surface to 14 inch diameter. Place on a lightly oiled pizza pan. Bake in the upper third of a 450 degree oven for 10-15 minutes until lightly brown with crisp edges.

Having a mixer with a dough hook is a true advantage for either recipe. But kneading by hand is very relaxing and therapeutic!


And finally: All recipes has a quick and easy version – no rising time – which is good when you are in a hurry. I think the rise time helps develop the flavor of the crust – but sometimes you just don’t have that luxury. So try this when in a hurry:

Recipe By:CHEF RIDER
“This is a great recipe when you don’t want to wait for the dough to rise. You just mix it and allow it to rest for 5 minutes and then it’s ready to go!! It yields a soft, chewy crust. For a real treat, I recommend you use bread flour and bake it on a pizza stone, but all-purpose flour works well too. Enjoy!”

Ingredients

  • 1 (.25 ounce) package active dry yeast
  • 1 teaspoon white sugar
  • 1 cup warm water (110 degrees F/45 degrees C)
  • 2 1/2 cups bread flour
  • 2 tablespoons olive oil
  • 1 teaspoon salt

Directions

  1. Preheat oven to 450 degrees F (230 degrees C). In a medium bowl, dissolve yeast and sugar in warm water. Let stand until creamy, about 10 minutes.
  2. Stir in flour, salt and oil. Beat until smooth. Let rest for 5 minutes.
  3. Turn dough out onto a lightly floured surface and pat or roll into a round. Transfer crust to a lightly greased pizza pan or baker’s peel dusted with cornmeal. Spread with desired toppings and bake in preheated oven for 15 to 20 minutes, or until golden brown. Let baked pizza cool for 5 minutes before serving.
Posted in Beef, Main Dish

Tator Tot Hot Dish – cheap and easy

College living? Newly married? Small children? Often there are times in life when you need a meal that is quick, and cheap, and still yummy. Enter the tator tot hot dish.

This is one of Cooper’s favorites. Often I ask the family what they would like to eat during the following week, and the hubbler will say – something easy, like a casserole. Casseroles are indeed a lovely option – usually one pot, usually makes a large quantity, usually reheats well – perfect for making on a Sunday for eating during a busy week. But they often contain cheese – and that is not an option for our youngest son. SO – this is a perfect casserole for him – no cheese! (But cheese can be added if you want and would kick it up a notch.)

This casserole – or hot dish, depending on where you come from – has it all. Meat, veg and potatos. Like most casseroles, it is very forgiving – have a few more veggies than called for? No prob – throw them in. Have cream of celery or cream of chicken or cream of mushroom soup in the pantry – close your eyes and pick one. It will still taste good. Make a large batch and freeze half. This is a very versatile dish.

So – the original recipe comes from the Tasty Kitchen cooking site.  Here is how we make it on a typical day.

Heat oven to 350 while you get ready.

Chop a large onion, or a couple of medium ones, and a clove or 2 of garlic. Saute in a little olive oil in a large skillet until soft, throwing in the garlic at the last minute.

Toss in a 2.25 lb package of ground beef. Brown the meat and then drain well.

While browning, empty a 26 oz package of frozen mixed vegetables into a large casserole dish – 11 X 13 glass will work. Or 2 smaller ones if that is all that is on hand.

Once the meat is well drained, return to heat and add 2 cans of cream of _____ soup. Cream of mushroom, celery, chicken – they all work well. Stir the mix until well combined and then put in a teaspoon to a tablespoon of Worcestershire sauce in – according to your taste – and give a final stir.

Then I pour this mix over the frozen vegetables stirring it in a little at a time until all combined.

Then top the mixture with tator tots. I have used the traditional tots, the potato crowns, and mini tator tots – you just want to cover the surface. I use the 28 oz mini tator tot bag – but the bigger tator tots require less work spreading.

Bung the casserole in the oven for 45 minutes and viola – an easy, veggie laden, one dish meal that can last a few days. Or not, depending on which 15 year old is at the table and with which friends.

Shopping list: Large onion, garlic cloves, 2.25 lb  ground beef, 2 cans cream of ___ soup, 26 oz frozen mix veg (we use beans, carrots, peas) and a 28 oz bag of mini tator tots or equivalent.

Posted in Basics, Cake, Dessert, Tailgate and party

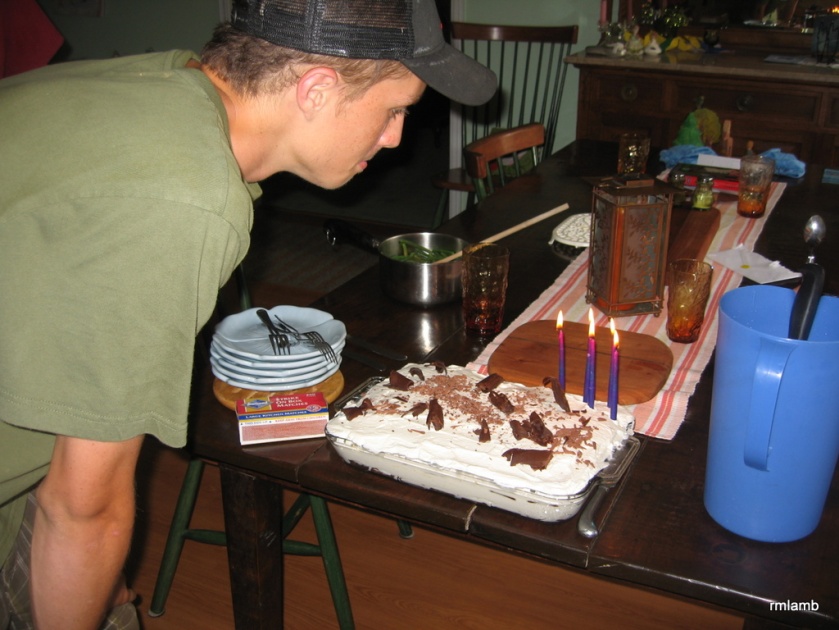
Need a quick birthday cake?Plus how to make whipped cream.

IMG_0838.JPG

Our eldest son Zack loved ice cream cakes – and so when I came across this “recipe” idea, I tried it, and he asked for it for several years.

First, you do have to plan ahead a bit. You need a 9 x 13 dish – but that isn’t essential. You can use any dish that can go into the freezer.

Buy some ice cream sandwhiches. You can buy many different flavors these days – chcoclate filled, mint filled, peanut butter filled, strawberry filled – or mix and match! You need a box of 24 for the 9 x 13 version.

You also need whipped cream. I am a purist, and I whip my own cream. (In a mixer, pour 2 cups of heavy whipping cream. Begin beating on high speed, but keep a very close eye on it or you will end up with butter! When the cream is beginning to thicken, I add powder sugar a tablespoon at a time until I get the desired sweetness. I also add almond or vanilla extract if it would compliment whatever I am serving the cream on – just a 1/2 teaspoon or so. Then I continue to whip to the stiffness I want, making sure to keep an eye on it so again, it doesn’t turn into butter.This will make a ton of whipped cream – dial it back to a cup of cream if you just want a smaller amount for serving with pie. But for this cake, use 2 cups. The whipped cream leftovers can be held in the fridge a couple of days, and put into coffee – YUM! You can also freeze the leftovers.)  But, if you don’t have a mixer, or the time, use a carton of coop whip – the large one for 9X 13.

Unwrap your ice cream sandwiches. Lay a layer of them on the bottom of the casserole dish. You might have to cut some of them to fit, but you want the entire bottom to be covered. Then “ice” this layer with the whipped cream or cool whip. Then add another layer of sandwiches. Then the final “icing” with whipped cream.

Now, you can really dress this up if you want. You can add jam or fruit topping before the whipped cream layer. Or Chocolate or buttersctoch syrup. And you can add sprinkles or other ice cream toppings on the top layer of whipped cream. Heath bar bits? Mini chocolate chips? Pecans? Chocolate jimmies? There is no wrong way to make this.

Put the cake into the freezer until firm. Add some candles when it is party time, and cut with a knife dipped in hot water. Enjoy!

Chocolate sandwiches – raspberry jam – dark chocolate curls for garnish!

Vanilla sandwiches, cherry pie filling, almond extract in the whipped cream, pecans on top!


Posted in Tailgate and party

Sausage Puffs

IMG_6447

Sausage puffs were a recipe I found on Tasty KitchenTasty Kitchen. I tried them out during a Christmas morning brunch – and they disappeared quickly. They have been on the brunch menu ever since, and are always requested when I ask what we should have on the brunch menu. These would be a great party food too.


IMG_4514

What you need:

  • 1 box Puff Pastry Dethawed
  • 1 pound Sausage
  • ½ cups Djon Mustard
  • 1 cup Shredded Cheese
  • 1 whole Egg
  • ¼ cups Water

Method:

Cut pastry into 24 squares.
Roll sausage up in 24 small melon ball-sized balls.
Put a small bit of mustard on the pastry. (We usually brush the pastry with mustard before cutting the squares – seems less fiddly)
Place one sausage ball onto each pastry square.
Sprinkle cheese over the sausage balls.
Mix egg and water together.
Brush edges of pastry with egg mixture.
Pull four corners of pastry towards center and seal over the sausage in the center. (Important to get a good seal or else the sausage will pop out of its pastry)
Place seam side down on a greased cookie sheet. (We just use parchment paper on our trays) 

Brush with leftover egg mixture.
Bake for 25-30 minutes at 350 degrees.
Serve with mustard or use a breakfast version with syrup!

IMG_6446

Posted in Tailgate and party

Jalepeno Poppers

This is a recipe I pinned on pinterest one day, and then made, and it has become a holiday tradition ever since. Often, I use jalepenos from my garden which I have chopped and frozen in the summer time, rather than from a can. I wish we could find the uncut version of crescent roll dough here in our part of the country – but we cannot, so we have to mush the triangles together – but the uncut dough is always worth looking for.

Here is the link to the original post. This post has photos which makes it very easy to make this recipe the first time. Below will be how we make it at our house.

Ingredients:

1 tube regular Crescent Rolls
1 (4 ounce) can Diced Jalapenos (you will actually only use half of this can)
8 ounce cube cream cheese, room temperature
1 Tbsp. sugar

Method:

Preheat oven 375 degrees.

In a bowl, mix the softened cream cheese and jalepenos and sugar. If a food processor is handy, whiz the ingredients up in that. I then put the mix in the fridge until I am ready to use it – making this part ahead is great for party prep.

When you are ready to bake the poppers, open your roll of cresent roll dough, and press it into rectangles. (4 triangles per rectangle)  Spread each of your 2 rectangles with 1/2 the spread. Or most of the spread – the rest can go on a tortilla for a snack. Roll up each rectangle long ways – and then cut the log into seperate poppers.

Put each popper on a greased tray – we use parchment paper instead – and you should have about 32 poppers total. Bake about 13 minutes or until golden brown.

Posted in Tailgate and party

Chili con Queso Dip – several versions

My grandmother, whom I called Nana, made this dip for a snack with tortilla chips.Great for a party or get together. The most important thing is not to let the cheese burn to the bottom of the pan.So when I make it, I use a small crock pot – my grandmother would use a double boiler. You could improvise a double boiler by heating water in a saucepot and placing a heat safe boil over the boiling water.

Nana’s Recipe:

Combine 2 pounds cubed Velveeta or Monterey Jack Cheese,  4 oz. can chili peppers, 1 small can diced tomatoes, 1/4 cup onion diced, 1/8 tsp garlic powder, 1 Tbs worcestershire sauce, 1/4 tsp oregano, and a dash of hotpepper sauce in a double boiler and simmer for 1/2 hour until melted and smooth.

There is a second option, which is a bit less work – not that the above recipe is all that much work. But when I was in college and later, when newly married, the Rotel version was very popular.

Here is a link to the rotel site with complete directions. But basically, buy a block of velveeta and a can of Rotel tomatoes and heat until melted.

A creamy, cheesy, spicy dip made with just 2 ingredients — Ro*Tel Tomatoes and Velveeta. Velveeta® is a registered trademark of Kraft Foods, Inc. Ro*Tel® is a registered trademark of ConAgra Foods RDM, Inc.

PREP TIME: 10 minutes
TOTAL TIME: 10 minutes
MAKES: 2-1/2 cups or 20 servings (2 tablespoons each)
INGREDIENTS
  • 1 can (10 oz each) Ro*Tel® Original Diced Tomatoes & Green Chilies, undrained
  • 1 pkg (16 oz each) Velveeta®, cut into 1/2-inch cubes
DIRECTIONS
  1. Combine undrained tomatoes and Velveeta in 1-1/2-quart microwave-safe dish; cover.
  2. Microwave on HIGH 5 minutes or just until Velveeta melts, stirring after 3 minutes. Remove from microwave; stir until mixture is blended.
  3. Serve warm as a dip with tortilla chips, crackers or cut-up fresh vegetables.
COOK’S TIPS

For a double recipe, microwave on HIGH 8 minutes or until Velveeta melts, stirring after 5 minutes. Drain 1 can of tomatoes if a thicker dip is preferred. To make on stovetop, combine undrained tomatoes and Velveeta in medium saucepan. Cook over medium heat 5 minutes or until Velveeta is melted completely and mixture is blended, stirring frequently. Garnish queso dip with 1 tablespoon drained Ro*Tel tomatoes and 1 cilantro leaf just before serving.

– See more at: http://www.quesoforall.com/recipes-Famous-Queso-7566.html#sthash.LwQPcWGy.dpuf

Posted in Basics, Bread

Batter Bread – with optional salted crust

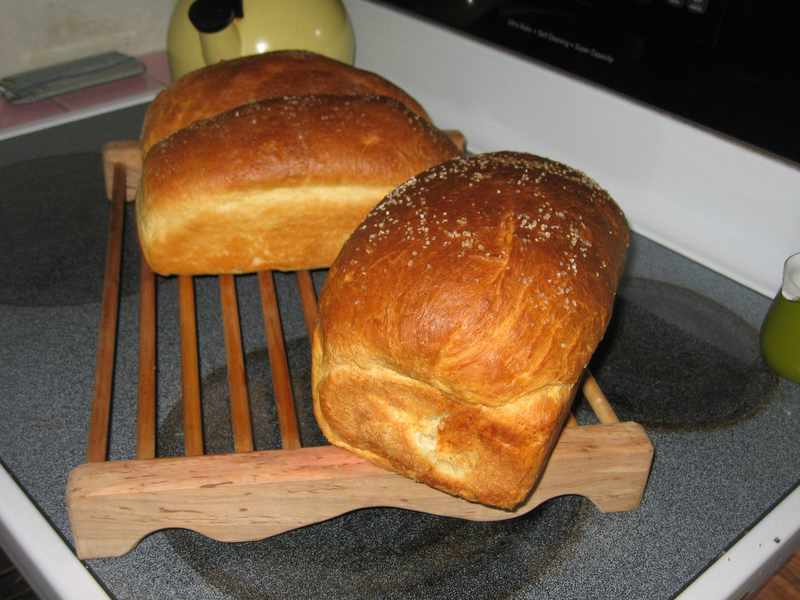
bread

I learned to make this bread when I was in 4th grade girl scouts. My best friend’s mother made this bread as their family’s sandwich loaves every week, and for a girl scout badge, had us over to her house and showed us how to make it. It is a good, basic, white bread – but the best part is that it is NO KNEAD!! No need to knead makes this a quick bread with a yeasty  loaf outcome.

My guys like it best with a salted crust. This is entirely optional – but very very yummy, especially with a coarser salt on top.

Ingredients:

  • 1 cup Milk
  • 2 Tablespoons Shortening (or Butter)
  • 2-½ cups Flour
  • 2 Tablespoons Sugar
  • 1 teaspoon Salt
  • 1 package Active Dry Yeast (.75 Ounce Packet)
  • 1 whole Egg

Method:

*Heat milk and shortening in a saucepan until warm – the shortening (or butter) doesn’t need to melt necessarily. Get it too hot and it will kill the yeast. I usually test it on my wrist and when it is pleasantly warm and the shortening is melting, I know it is ready. You can use a thermometer and heat it to the recommended temperature on the side of the yeast packet, about 110 – 120 degrees.
*Thoroughly whisk together flour, sugar, salt and yeast in a large bowl.
*Add egg to flour mixture and stir in.
*Add milk to the flour mixture, and stir 500 strokes. I also do this in my KitchenAid mixer when rushed…but the stirring is great exercise and the kids like to do it. The dough will be wetter and stickier than most bread doughs.
*Let rise (in a warm spot like a sunny windowsill or in a warmed oven) until doubled in the bowl, covered with a cloth. (1/2 – 1 hour)
*Stir down, and place dough in a greased loaf pan. (I prefer to line the loaf pan with a parchment saddle to make it easier to get out) The dough does not need to be shaped, and is a rather sticky, wet dough, compared to other bread doughs.
*Let rise until it doubles. (Another 1/2 – 1 hour). Meanwhile, preheat oven to 350 degrees.
*Bake in oven for 40 minutes or until top of loaf is light brown.

Optional: I always melt butter over the top of my crust during the last 5 minutes of baking… Just place a few pats of butter over the top and let them melt and spread. My boys and I like it best when I then sprinkle the top with kosher or sea salt. It doesn’t matter if it is course or fine, although most of the time we use fine salt. This makes for a wonderful, tasty bread and butter treat, and is also good for “salad” sandwiches like tuna or chicken or ham. The salty taste is a wonderful added extra.

This bread is also good for adding chopped herbs, or shredded cheese, and sometimes I add a mixture of cinnamon and raisins that I have soaked in boiling water until plump.

I often double the recipe – but then you have to use the KitchenAid to stir it all together.